Installation
MyoSuite uses git submodules to resolve dependencies. Please follow steps exactly as below to install correctly.
Requirements
python >= 3.9 (if needed follow instructions here for installing python and conda)
mujoco >= 2.3.6
Installing the pip package
Using pip:
conda create --name MyoSuite python=3.9
conda activate MyoSuite
pip install -U myosuite
Using uv (recommended for faster installation):
uv is a fast Python package installer that can significantly speed up installation times.
First, install uv (if not already installed):
curl -LsSf https://astral.sh/uv/install.sh | sh
Then install MyoSuite:
uv venv
source .venv/bin/activate  # On Windows: .venv\Scripts\activate
uv pip install -U myosuite
(alternative) Installing from source
To get started with MyoSuite, clone this repo with pre-populated submodule dependencies
Using pip:
git clone --recursive https://github.com/facebookresearch/myosuite.git
cd myosuite
pip install -e .
Using uv:
git clone --recursive https://github.com/facebookresearch/myosuite.git
cd myosuite
uv pip install -e .
Testing the installation
You can test the installation using
python -m myosuite.tests.test_myo
You can visualize the environments with random controls using the below command
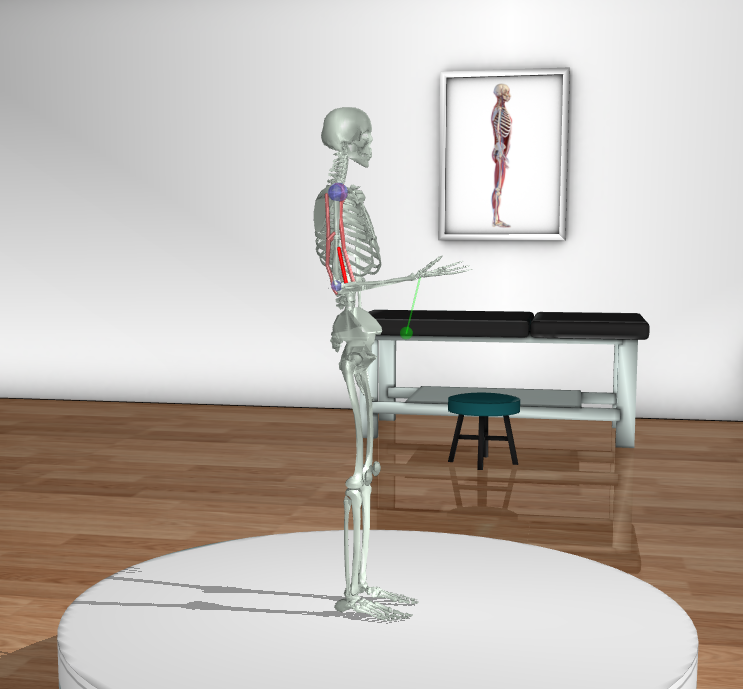
python -m myosuite.utils.examine_env --env_name myoElbowPose1D6MRandom-v0
Note
On MacOS, the need of a launch_passive option might require that the Python script be run under mjpython i.e. mjpython -m myosuite.utils.examine_env –env_name myoElbowPose1D6MRandom-v0
Examples
It is possible to create and interface with MyoSuite environments like any other OpenAI gym environments.
For example, to use the myoElbowPose1D6MRandom-v0 environment it is possible simply to run:
from myosuite.utils import gym
env = gym.make('myoElbowPose1D6MRandom-v0')
env.reset()
for _ in range(1000):
  env.mj_render()
  env.step(env.action_space.sample()) # take a random action
env.close()
By default it will activate the simulator and the following visualization is expected: